How to transfer files using WinSCP
This page explains how to transfer files between your device and the supercomputing system using WinSCP.
Prerequisites
If you have not complete Getting Started: Logging in to supercomputing system, please complete it before reading this page.
Steps
Transform secret key format
Before using WinSCP, you have to transform the secret key file from into PuTTY format.
Read this page and transform your secret key.
Transfer files using WinSCP
Start WinSCP.
Click “Advanced …” in the Login window.
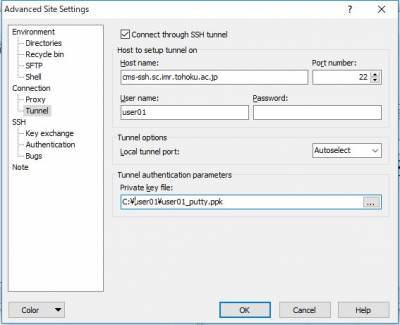
Select “Tunnel” fo “Connection”, and check “Connect through SSH tunnel”. Fill in the box as follows, then click “OK”.
Host name: cms-ssh.sc.imr.tohoku.ac.jp
User name: your UserID (Example: user01)
Private key file: path to the private key (Example: C:\user01\user01_putty.ppk)
Select “Session” and put the hostname (example:super.sc.imr.tohoku.ac.jp) and your user ID.
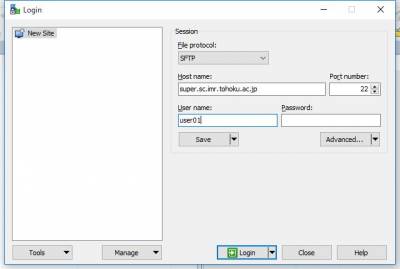
Click “Save…” button.
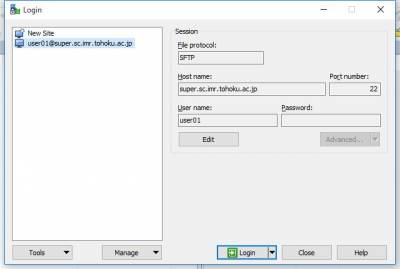
In the next time, the procedures of 2-4 can be omitted and simply click “Login” button in 5.
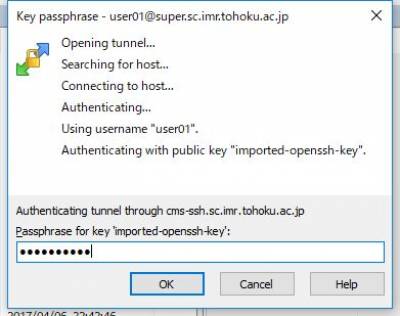
Enter your passphrase and click “OK” button.
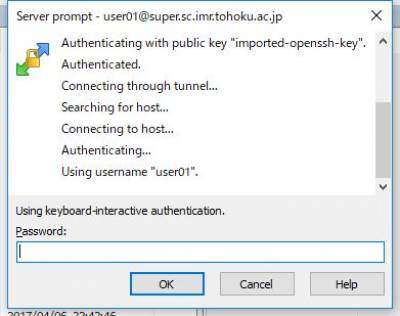
Enter your password and click “OK” button.
You can transfer files once the directories appear as shown below.